

Hi again,
let’s check how we can create curve mullion and panel with regular tools in Revit, honestly I have not enough experience to do this with Dynamo and every time I want to create any thing which is unusual I try to do that with Regular tools.
We have System Family:Curtain wall in Revit and this could be very useful for many shape of modeling , but as you know panels are not curve for curtain walls.

If you add Mullion for curtain wall you can see Mullions are not Curve too.

For fix this problem we can use simple trick, this could be fixed with Basic Wall type in Revit.
Every thing you need is just create a wall with thickness like 2cm and then change the material as glass.

Go to the Edit type Properties for Curtain Wall and make change for Curtain panel to the new Basic wall , that we called Glass.

Now we have Curtain wall With Curved Panel and I can say some useful tricks at this situation.
Because of the base category for Curtain Panel ( Which is Wall Category ) you are able to use Door and Window over the Curtain Wall.
Another things is about the Opening, you can make any type of opening and place them over the curtain wall like the below picture.

Also, you are able to use Edit profile command like before without any limitation. ( if you create any curtain wall panel family then try to use Edit Profile command then you miss some panels )

Ok, Next step is about the Mullion, If you try to add vertical Mullion everything is ok, but for Horizontal Mullion no.
This problem could be fixed with Simple Sweep Shape in your Wall Type ( Glass )
You can create simple shape for Mullion Profile Like Rectangle 50×150 and make some adjustment for position like the below picture.
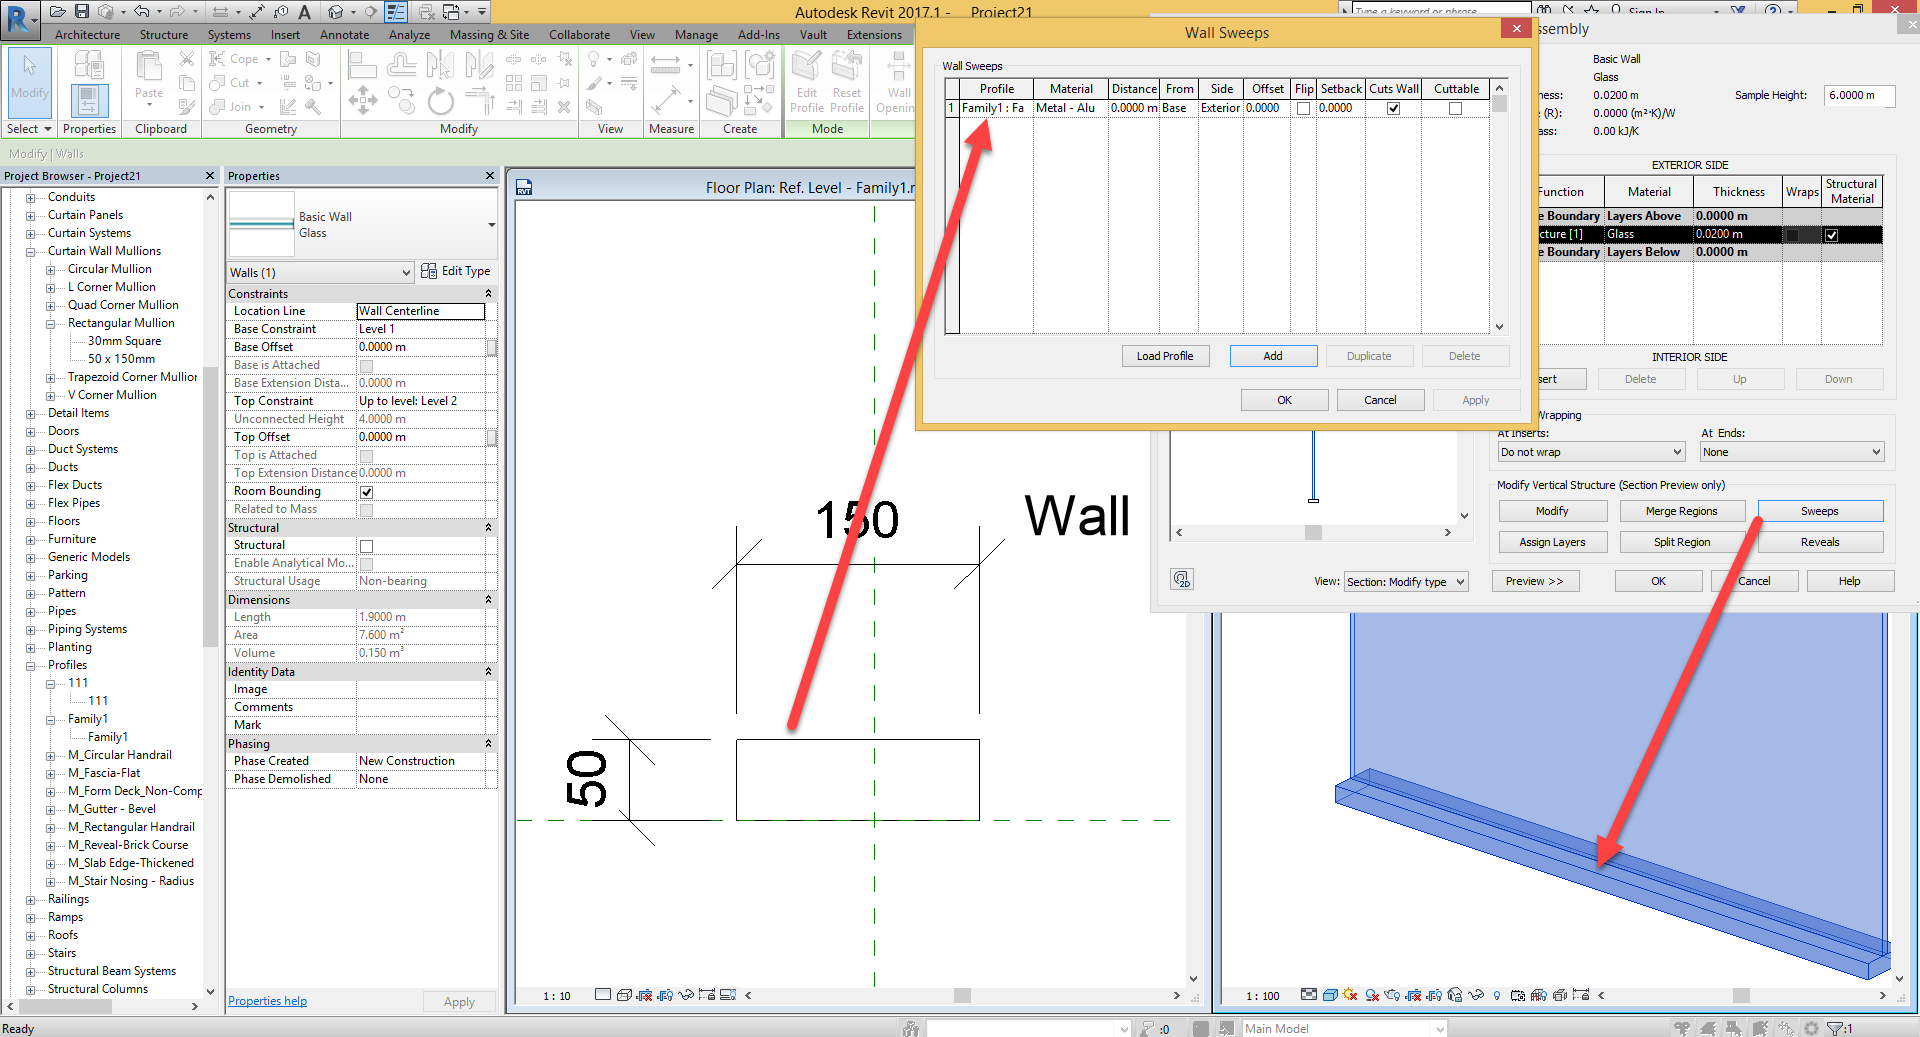
Perhaps you are thinking about many sweeps here but we need just one sweep.
Then create a sweep in the Edit Assembly Dialogue and make change material as Aluminum.
Go to the 3d View, Select the Wall and make some edit like the below picture, Change the Horizontal Grid to Fixed Distance and Horizontal mullion to None.
Now you have good result as you can see.

For top panel of this wall you can use two different way.
First: You can create new type of Wall sweep with Profile 50×150 and use this sweep manually over the top edge of curtain wall. ( I prefer this )

Second : you can create another wall type With two sweep with the different Constraint at the Base and Top like the below picture. Then you should change the Top panel manually to the new Wall type.

Final step could be about the Schedule, if you create schedule for curtain panel then you have exact with for each panel, horizontal mullion length is the same with panel width.
But you should be careful about the Panel Area Because for the Sweep With. You can create Calculated value for Panel Area like the below picture.

And final Schedule could be about that wall Sweep Length.
Good Luck.

Going to be some very expensive curtain walls and glazing!
LikeLike