
Ok, another trick.
As I know many of you are looking for workflow to separate schedule per sheet, and I wan to show you how you can do this.
For start you can open rac_basic_Sample_Project.rvt . Go to the sheet A001 – Title Sheet. You can find schedule here.

Select the schedule at this sheet and hit the symbol as you see in the below picture.

Now you have two separate schedule in the sheet. Also you can try to make some adjustments with the grip as you see in the below picture.
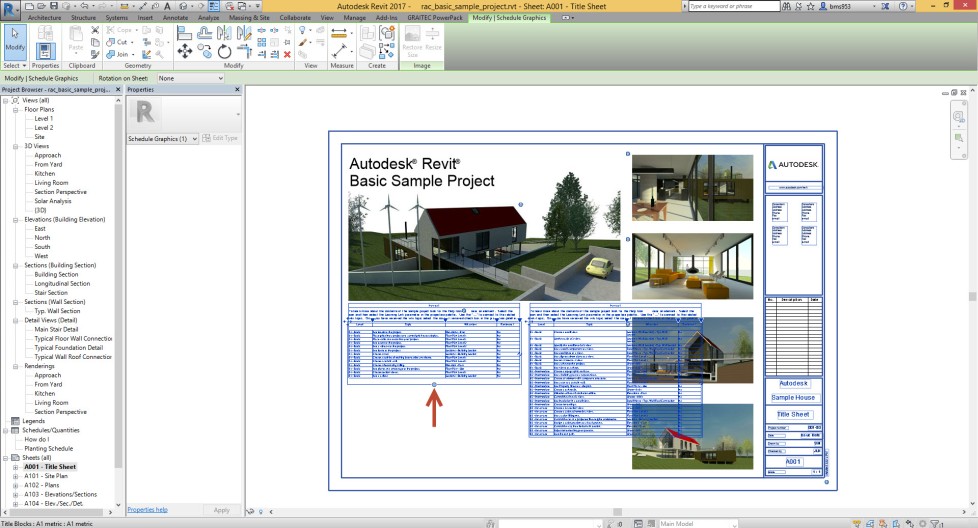
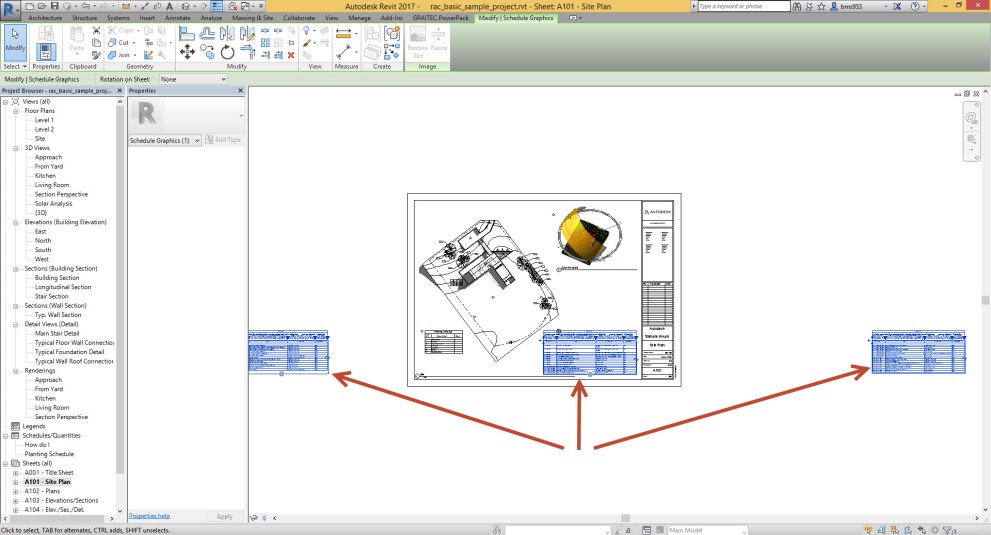
Next step is very important, because you need to make move with the little icon that you can find in the target of arrow 1.
You need to move the schedule with the distance over of the length of the sheet. Also you will be careful about the position between the parts of schedule table. I prefer to use otrack that you can see when you want align the top of the schedule table together.

You are able to create several separation between the schedule.
And make move according to that rules I said before.
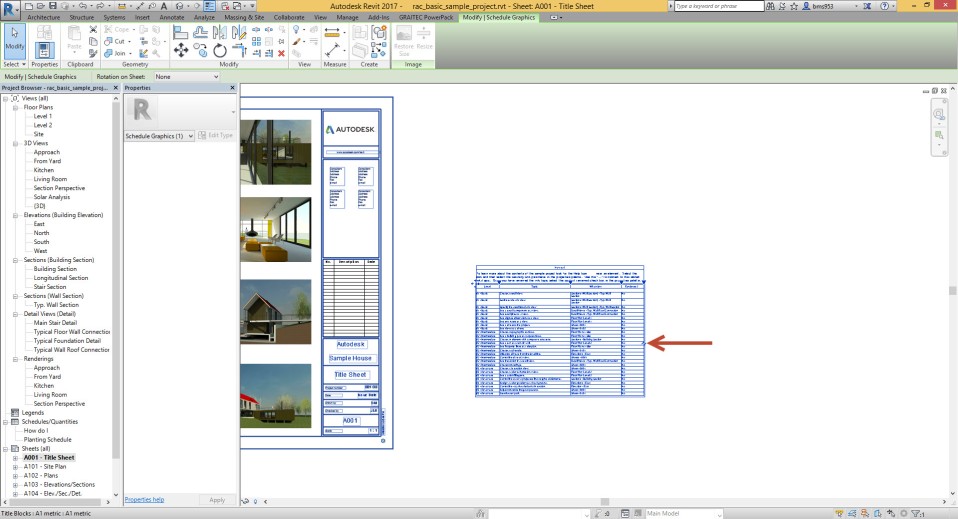
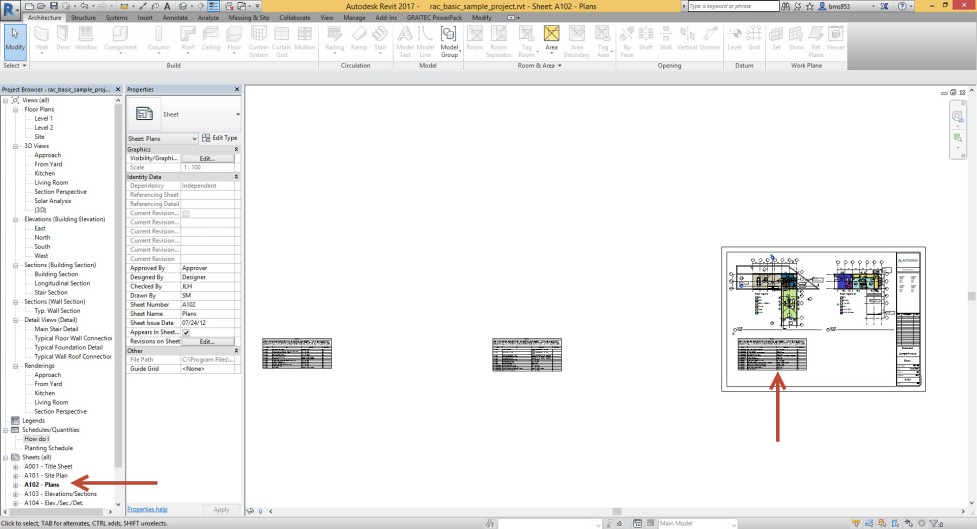
Go to the next sheet and try to move all of the schedule together and put that schedule you want appear in the sheet area.
Just with simple click and drag on the schedule.
( you should not to use Move symbol in the left of top corner )
As you see in the below picture the position between of each parts not changed , just move all of table together.
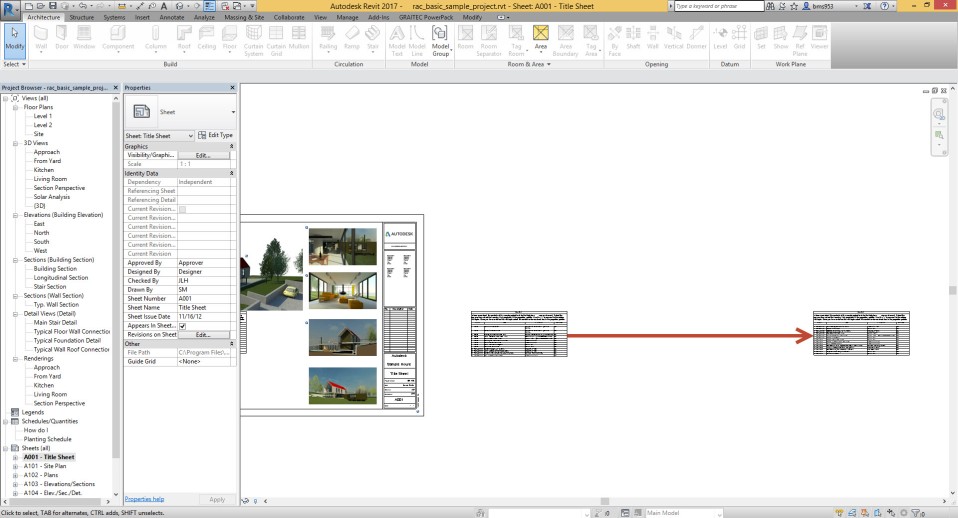
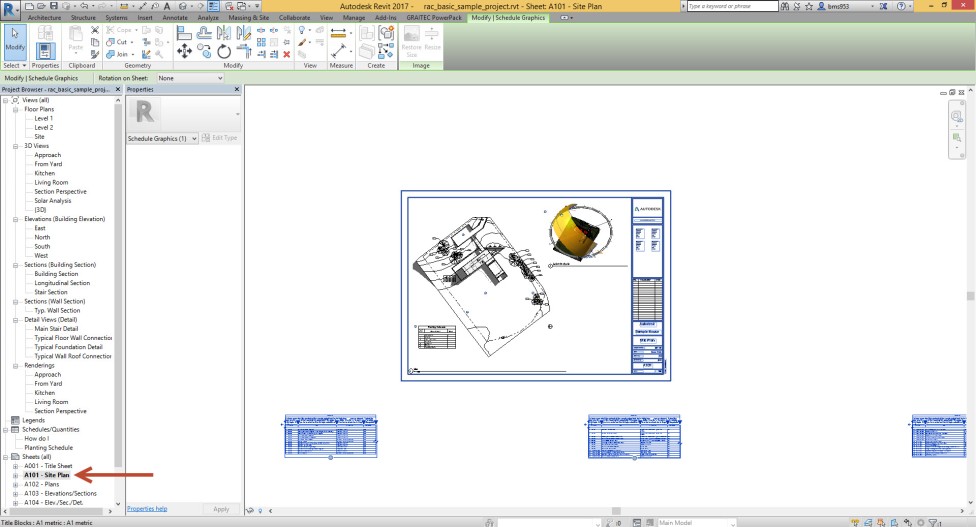
Put the last table in the next Sheet.
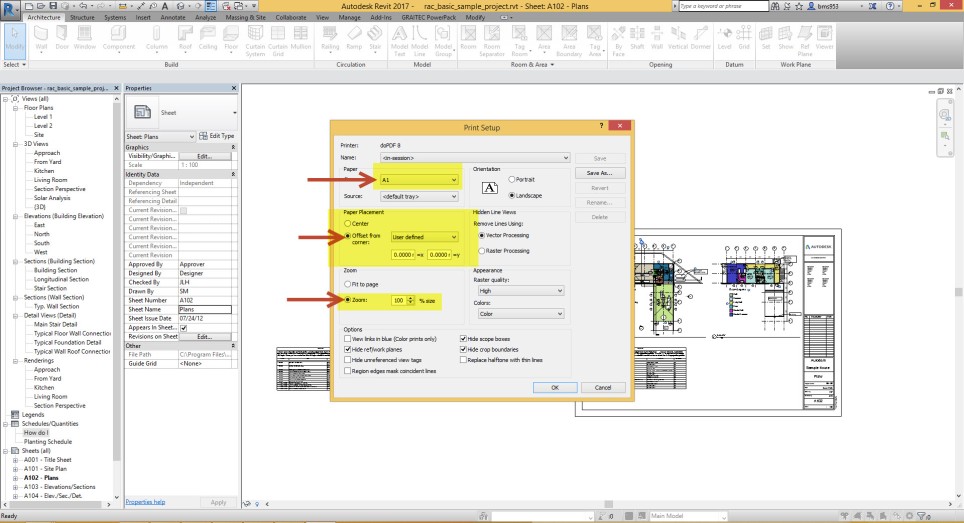
For the final step you need to some adjustments in print dialogue like the below pictures. Go to the print dialogue and turn on which sheets as you need.

Go to the setup for printer and select the right Sheet size , change the paper placement like the below picture, and change the zoom to the zoom 100 % and hit the OK button .
*** Note: To be able to get right output in second, third or etc, you need to use user defined offset and specify specific length between your schedule and boundary of your sheet. (Revised on 2019/03/12)
You can see the result and every thing is ok, I hope you enjoy this.

hello,
It doesn’t work for my schedule, it only works on the first sheet and the others aren’t centered on the sheet (nor exactly on the first sheet…) Any idea what the problem could be?
LikeLiked by 1 person
I am having the same issue as ir above, any ideas what is causing this?
LikeLiked by 1 person
yeah, exact same issue as the above comment here. if anything is left of the sheet, that’s where the user defined 0,0 co-ords start.
LikeLiked by 1 person
Hi to all and sorry for late reply, I have to revise one part and have to say for those sheet you have split schedules you need to use user defined offset to be able to print it out.
LikeLike
If you put two invisible lines in the titleblock equally far left and far right of center then you can skip user offsets and just use print orientation center
LikeLike
yes it works, thanks
LikeLike