Re Invent Revit : 1.Introduction

Hi,

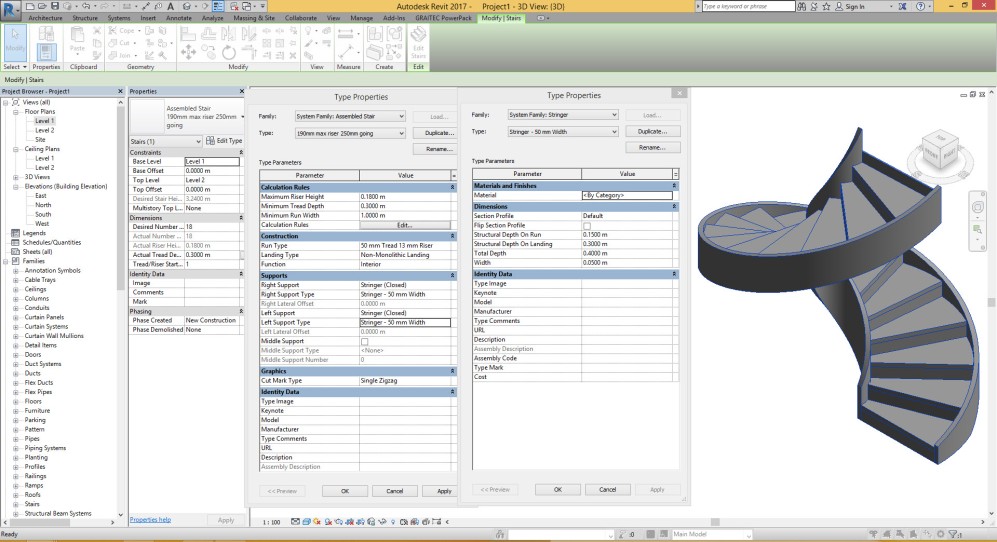
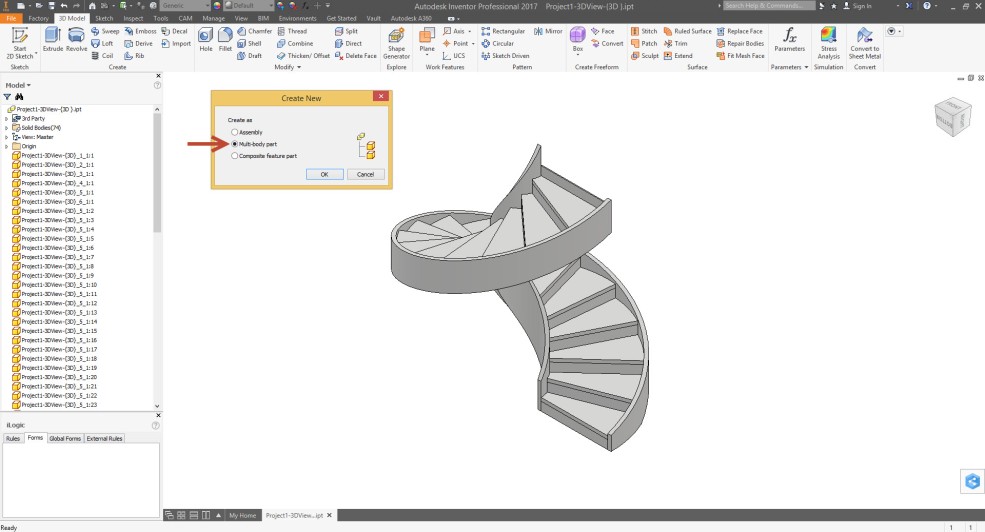
I was speaker for BiLT Asia event and I had two session, one for Revit and another for Inventor.


Assembled Stair


BIM and Manufacturing
Assembled Stair

I mentioned that session is for Expert but after I start my session I understood we don’t have any audience with depth knowledge about Inventor in room.

Karbandi Model
Karbandi Drawing

Then I asked is anybody familiar with Inventor?! Respond was terrible, just one person had little experience with Inventor. Important things is my session was about Building Industry and as I understood at least here ( Singapore ) we don’t have many people who are using Inventor in Building Industry.

Decorative Shelf Model


Decorative Shelf Drawing

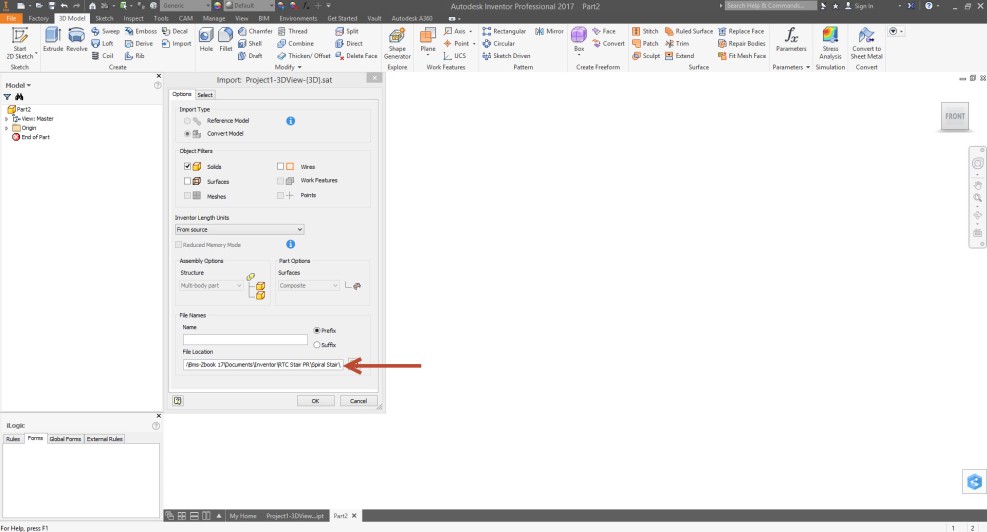
After that I make decision to write and talk more about what we can do with Inventor in Building Industry. Also I want start new serious of post for teaching Inventor to all of my blog readers. And in the same time I will explain about what we can do with this software.

Furnace


I had short discussion with Phil Lazarous from BiLT Committee and he preferred a blog with name ” Re Invent Revit ” . But I don’t want to make new blog, because currently many of my readers are from Building industry and they are involving in BIM Process and i’m looking for this people, why I should create new Blog.


Hence, I will go for this serious at this blog and I am writing about this with name “Re Invent Revit”

I will provide many file for practice, then you can use Inventor 2018 Student Version (  Autodesk is very generous ) if you don’t have subscription account for Autodesk Inventor in your PC or Laptop.

Space Frame

Good Luck,

Behzad Meskini

RTC Events Singapore 2017, Excellent detailing and presentation for Wall, Foor, Roof and Ceiling

This is my honor to be a part of RTC Event 2017 in Marina Bay Singapore as a speaker, I will explain everything for the best solution and workflow in modeling and detailing for WFRC category.

If you are interest to be attendance at this event I will say welcome to you and I hope to see you in RTC Event 2017, Singapore at 30 March – 1 April.

Also, thanking the RTC Committee , Richard Kuppusamy  , Heidi Lam and Phil Lazarus for what you are doing as a volunteer for RTC .


revit

Taking Stair from design to fabrication with Revit and Inventor, just in 10 minutes.

Many of my friend in the fabrication industry asking me about the workflow for making documents for stair fabrication.

I refer them for using Autodesk Inventor because of ability of this software.

At this post I want to show you how it could be simple for Revit and Inventor users to create an assembled stair with full of detail just in 10 ,

Let’s start,

What we need as a material is very simple, First step is design what you need with the precise overall dimension in Revit and this could be very easy in Revit. Like the below picture I create an stair with spiral shape between two level with 3.24 meter height.

Stair Width = 1 m

Stair tread Depth = 0.3 m

Maximum Riser Height = 0.18 m

Stair stringer Size = 0.05 m x 0.4 m

Structural Depth on Run = 0.15 m

Structural Depth on Landing = 0.3 m


10-1-2016-12-29-39-am

you can use Isolate command in the project area for which stair that you want create detail.

Go to File > Export > Cad Format > ACIS *.sat

Now Start Autodesk Inventor and open SAT file in Inventor as a Part with multi solid body

10-1-2016-12-40-04-am

Make sure about where you are saving the file.

10-1-2016-12-40-33-am

The result should be like the below picture. you can save it with ipt format.

10-1-2016-12-41-22-am

You can create regular helper object ( Work Axis and Work Points ) for the future modeling like the below picture.

10-1-2016-12-44-57-am

Create 3d Sketch like the below picture according to the Helper object ( Work Axis and Work Points )

10-1-2016-12-49-58-am

Create two Sweep as surface according to 3d Sketch and two simple 2d Sketch like the below picture. You will need this surfaces for manage the sweep command for that profile you want create with Generative shape design tool.

10-1-2016-12-53-20-am

Create a hole and make pattern from that hole with rectangular pattern like the below picture.

10-1-2016-12-58-13-am

Create an iLogic part with several option that you need as a tread for stair and use this for final stair.

10-1-2016-1-01-15-am

Create a new assembly and place that part you open as SAT format with multi body and saved with ipt format like part.

Now you are able to create structural frame for body of stair according to what you have in the basic model that you import from Revit and mange in the Part environment.

10-1-2016-1-05-58-am

Now you can place the first tread as iLogic part and the dimension for this tread is depend to the basic shape of stair in Revit.

10-1-2016-1-13-05-am

For the next step you can create pattern for this tread and use Feature pattern depend to the Hole pattern in the Basic stair part.

10-1-2016-1-15-26-am

Now go to the IDW environment and make some drawing.

10-1-2016-1-18-03-am

This is very fast and unique workflow for everyone who looking for fabrication in stair category.


9-29-2016-11-26-06-am

9-29-2016-11-29-24-am


10-1-2016-1-21-43-am

10-1-2016-1-21-57-am


Enjoy this.